Welding is an essential skill in many industries, and operating a welding machine is a great way to start. With the right training and knowledge, you can create strong, beautiful welds that will last for years. Operating a welding machine can be intimidating if you’re not familiar with the process, but with the right instruction and practice, you can become a master of welding in no time. In this article, we will cover the basics of welding machine operation, from safety to setup and start-up. So, if you want to become an expert welder, keep reading and learn how to operate a welding machine.
What safety precautions should I take when operating a welding machine?
Welding is a hazardous endeavor and must be done with caution and proper safety protocols in place. Here are some tips to keep in mind when operating a welding machine:
- Always wear protective gear, such as a welding helmet, gloves, and a long sleeved shirt to protect your skin from sparks and spatter.
- Ensure that the welding area is free of combustible materials or other flammable objects.
- Make sure the welding machine is properly grounded and connected to an appropriate power source.
- Keep your work area well ventilated to avoid inhalation of noxious fumes.
- Do not touch the electrodes or the welding arc.
- Be sure to check the machine and its components for any signs of damage before operating.
- Keep a fire extinguisher nearby in case of an emergency.
- Always follow the manufacturer’s instructions for proper setup and use.
By following these safety precautions, you can ensure that you and those around you are safe when operating a welding machine.
What type of welding machine am I using and what materials is it suitable for?
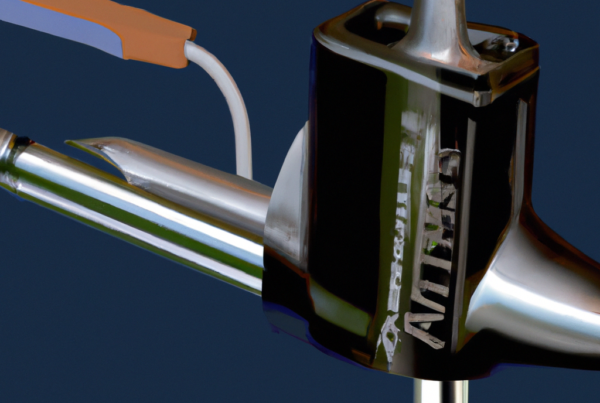
The type of welding machine you are using is a MIG welder. MIG stands for Metal Inert Gas, which is an arc welding process that uses a consumable wire electrode and an inert gas to protect the weld from oxidation and other contaminants. MIG welders are suitable for welding a variety of metals including mild steel, stainless steel, aluminum, and other alloys.
To operate a MIG welder, follow the steps listed below:
- Connect the welding machine to a power source.
- Set the welding machine to the correct voltage and wire speed for the job.
- Attach the appropriate welding electrode to the welding machine.
- Turn on the gas, and adjust the flow rate and pressure to the correct settings.
- Adjust the welding machine to the correct amperage and wire speed.
- Position the welding gun at the correct angle and distance from the workpiece.
- Start the welding process, and maintain a consistent speed and pressure as you weld.
- Stop welding and turn off the gas when finished.
MIG welding is a fast and efficient process that provides a strong and reliable weld. With proper technique and practice, it can be used to weld a variety of materials and is suitable for a variety of applications.
How do I set up a welding machine?
To set up a welding machine, follow these steps:
- Place the welding machine on a stable surface.
- Connect the welding machine to the power source.
- Select the welding process, such as MIG welding or TIG welding.
- Set the amperage, voltage, and wire speed for the welding job.
- Set up the wire feeder and torch.
- Connect the grounding cable to the welding machine.
- Put on the appropriate safety gear.
- Check the area for combustible items and clear them away.
- Start the welding machine.
You are now ready to start welding. Always follow all safety guidelines and procedures when operating a welding machine.
How do I adjust the welding machine for the type of weld I’m doing?
Adjusting a welding machine for the type of weld you are doing is a crucial step in the welding process. Here are the steps you should take to ensure you have the correct settings for your project:
- Set the voltage: The voltage setting will depend on the thickness of the material you are welding. For thinner materials, use a lower voltage, while thicker materials will require a higher voltage.
- Adjust the amps: The amps should be set to the maximum recommended by the welding machine manufacturer, or the minimum necessary for the type of weld.
- Set the wire feed speed: The faster the wire feed speed, the hotter the weld. For thinner materials, set the wire feed speed to the lowest setting, while for thicker materials, set to the highest.
- Adjust the gas flow: Gas flow is important to help protect the weld from oxidation. For smaller welds, use a lower gas flow, while for larger welds, use a higher gas flow.
- Choose the type of wire: Different types of welding wire can be used for different types of welds. Make sure you are using the correct type of wire for the weld you are doing.
By following these steps, you should be able to adjust your welding machine to the correct settings for the type of weld you are doing.
What type of welding rod should I use?
The type of welding rod you should use depends on the material you are working with and the type of welding you’ll be doing. For most welding projects, a mild steel rod is the best choice. Here are some tips for using a mild steel rod:
- Choose an electrode that is compatible with the metal you are welding.
- Choose the right diameter of electrode for the thickness of the metal you are welding.
- Make sure the electrode is clean before use.
- Set the welding machine to the correct amperage.
- Maintain a consistent speed when welding.
- Keep the electrode at the proper angle when welding.
- Be sure to keep the electrode tip clean during welding.
- Allow the weld to cool before handling.
Follow these tips to ensure a successful welding project. It’s important to understand the type of welding rod you need for your project, and to use the proper techniques when welding. This will help you get the best results and ensure the safety of yourself and those around you.
What is the proper technique for welding?
Welding is a process that uses intense heat to attach two or more pieces of metal together. To properly weld, it is important to follow the proper technique.
Here are the steps to use a welding machine:
- Select the type of welding to be done (MIG, TIG, Arc, Oxy-Acetylene, etc).
- Prepare the welding surface by cleaning, grinding, and/or sanding the area.
- Set up the welding machine according to the type of welding being done.
- Adjust the voltage, amperage, and wire speed on the welding machine.
- Put on the appropriate safety gear such as gloves, helmet, and apron.
- Strike the arc by touching the electrode to the metal and quickly pulling it away.
- Hold the electrode at a 90-degree angle to the metal and move it in a circular motion.
- Hold the electrode in one spot for a few seconds before lifting it away.
- Continue welding around the edges of the metal.
- Fill any gaps between the two pieces of metal with the electrode.
- Stop the welding process when finished.
- Turn off the welding machine and remove the safety gear.
By following these steps, you can successfully weld two pieces of metal together. It is important to practice welding in order to perfect the technique.
How do I prepare the metal for welding?
To prepare metal for welding, you should:
- Clean the metal surface with a wire brush to remove any rust, paint, or other debris.
- Check for any cracks, pits, or other defects that may interfere with the welding process.
- Apply a coating of flux or other welding aid to the metal surface.
- Set up the welding machine according to the manufacturer’s instructions.
- Position the metal pieces to be welded in the proper orientation.
- Adjust the power settings on the welding machine to the appropriate amperage for the job.
- Start welding, making sure to move the welding torch along the metal pieces in a steady, even motion.
By following these steps, you can prepare the metal for welding and ensure a successful weld.
How do I choose the correct welding speed?
Welding speed is an important factor in achieving a quality weld. Here are some tips on how to choose the correct welding speed:
- Know the material you are welding. Different materials require different welding speeds.
- Set the welding speed to the lowest setting that will produce a satisfactory weld. This will reduce the risk of burn-through or warping.
- Start with a slow speed and gradually increase the speed until you achieve the desired results.
- Always start with the lowest voltage and amperage settings and then adjust them as necessary.
- Keep the arc length as short as possible. The longer the arc length, the higher the welding speed.
- Be aware of the welding position. Different welding positions require different welding speeds.
- Follow any specific directions for the welding speed from the manufacturer of the welding machine.
The ideal welding speed should be around 80, but it can vary depending on the material, position, and the welding machine. Generally, it is best to keep the welding speed below 120 to ensure a quality weld.
How do I check for proper alignment of the weld?
When checking for proper alignment of a weld, there are a few key steps to follow:
- Check the weld for any gaps or irregularities in the joint.
- Measure the weld seam for uniformity, checking for any gaps or excessive overlap.
- Check the weld bead for any signs of undercutting or undercut porosity.
- Inspect the weld for any signs of cracking or porosity.
- Check the weld for any signs of undercut, slag inclusions, or incomplete fusion.
- Measure the weld for proper penetration into the material.
- Check for a uniform weld profile, free of any distortions.
To ensure proper alignment of the weld, it is important to measure the weld with a welding gauge or a ruler. The measurements should always be within +/- 0.5mm of the design specifications. The weld should have a uniform cross-section and a uniform weld bead. The maximum acceptable weld misalignment is typically 120mm, but a good weld should have an alignment of 80mm or less.
What post-welding activities should I do?
Post-welding activities are important steps to ensure a proper and safe weld. Here are some post-welding activities you should do:
- Inspect the weld to make sure it is free of defects and meets the required specifications
- Clean the weld to ensure better joint strength
- Check the weld for any signs of warping or deformation
- Check the welding machine for any signs of damage
- Check the connections for any loose wires or other problems
- Make sure the welding machine is properly grounded and insulated
- Check the weld for any cracking or other fractures
- Check the weld for any signs of porosity or other flaws
After completing these post-welding activities, you should be sure that the weld is strong and of high quality. For more information on how to operate a welding machine, please refer to the operator’s manual.