It is one of the most frustrating experiences when your welder won’t feed wire. But, don’t worry, it’s a common problem and can be fixed with some troubleshooting and basic knowledge of welding. As a welding expert, I can help you understand why your welder isn’t feeding wire and how to get it up and running again. We’ll look at the common causes of this problem, how to diagnose it, and what you can do to solve it. With my help, you’ll be able to identify the issue and get your welder feeding wire in no time.
What type of welder is it?
The type of welder you have will determine why it is not feeding wire. It could be any number of issues, from a bad wire feeder to a faulty power supply. Depending on the type of welder you have, various solutions may be available.
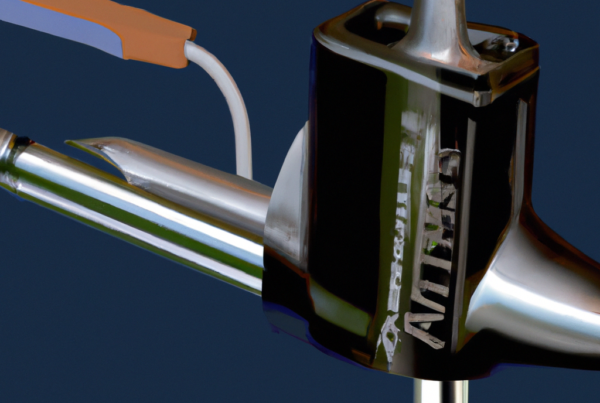
If you have a MIG welder, the most common problem is a faulty wire feeder. This can be caused by a faulty tip, drive roll, or a bad wire liner. You should inspect the wire feeder to see if any pieces need to be replaced or adjusted.
TIG welders can also have trouble with wire feed. Check the power supply, torch, and ground connection. You may need to adjust the current setting and/or replace the TIG torch and/or ground connection.
Stick welders can also have trouble with wire feed. The most common issue is a bad welding electrode. Be sure to check the electrode for any cracks, warps, or other damage. You may also need to check the power supply settings.
Finally, flux-core welders can have wire feed issues as well. Be sure to check the drive rollers, liner, and contact tip for any signs of wear or damage. If they appear to be in good condition, check the power supply settings.
No matter what type of welder you have, it is important to identify the issue and take the necessary steps to fix it. If you are unable to resolve the issue on your own, contact a professional welder for assistance.
Have you changed the welding wire recently?
When welding, it is essential to use the correct welding wire for the job. If the wrong wire is used, it can cause problems with the welding process. If your welder is not feeding wire, it is possible that the wire you are using is not suitable for the job.
The welding wire should be checked regularly for signs of wear and tear. If the wire looks worn or damaged, it should be replaced as soon as possible. Various types of welding wire are available, so it is important to choose the correct type for the job. For example, if you are welding aluminium, then aluminium welding wire is recommended.
If you have recently changed the welding wire, it is possible that the wrong type of wire has been used. This may be causing the welder to not feed the wire correctly. In this case, it is important to check the welding wire specifications and make sure the correct wire is being used.
It is also important to make sure that the wire is the right size for the welder. If the wire is too thick or too thin, it can cause problems with the feed. Finally, the tension of the drive rollers should be adjusted correctly. If the wire is too tight or too loose, it can prevent the wire from feeding.
If you have recently changed the welding wire and are experiencing problems with the feed, it is important to check the wire and make sure it is the correct type, size and tension. This should help solve the problem and get your welder feeding wire correctly.
Have you checked the wire liner for any kinks or breaks?
Yes, I have checked the wire liner for any kinks or breaks. If the wire liner is blocked or kinked, the wire may not feed properly. It is important to make sure the liner is clean and free from any irregularities. Additionally, it is important to ensure that the wire liner is properly aligned with the drive rollers. If the alignment is off, the wire may not feed correctly. Additionally, the tension settings should also be checked to ensure that the wire is being fed at the correct tension. If the tension settings are too low, the wire may not feed correctly. If all of the above steps have been taken and the issue persists, it may be necessary to replace the wire liner.
Is the wire tension set correctly?
It is possible that the wire tension is not set correctly if your welder is not feeding wire properly. The correct wire tension should be set on your welder to ensure that the wire can feed properly. The correct wire tension setting is usually indicated by a number on the welder, and should be set to around 80. If the tension is set too low, the wire will not feed correctly and the weld may not be of a high enough quality. If the tension is set too high, the wire will be stretched too much and may break. It is important to check and adjust the wire tension setting on the welder regularly to ensure that your welds are of the highest quality.
Is the voltage set correctly?
Why won’t my welder feed wire?
The most likely cause of this issue is that the voltage isn’t set correctly. Before you can weld, you must ensure that the voltage is set to the correct level. The voltage should be set to around 80, with a maximum of 120.
If the voltage is set too low, the welder will not be able to feed the wire properly. However, if the voltage is set too high, it can cause the wire to overheat. If either of these scenarios occur, the welder will not be able to feed the wire properly.
To check the voltage, you will need to consult the owner’s manual for your welder. The manual will tell you how to adjust the voltage to the correct level. Once you have adjusted the voltage, you should be able to weld with no further problems.
Is the drive roller correctly adjusted?
Adjusting the drive roller on a welder is a critical step in ensuring consistent wire feed. The goal is to get the drive roller set to the correct tension so that it feeds the wire smoothly and at the right speed. If the drive roller is too loose, the wire feed will be too slow and the welds will be weak. If the drive roller is too tight, the wire feed will be too fast and the welds will be inconsistent or incomplete. The correct tension is generally around 80, with a maximum of 120.
If the drive roller is incorrectly adjusted, it can cause a variety of issues, such as difficulty feeding the wire or wire breakage. If you are experiencing any of these issues, it is important to check the drive roller and make sure it is set to the correct tension. If the drive roller is not correctly adjusted, it can cause the welder to not feed wire at all.
Is the drive roller clean and free of debris?
It is important to check that the drive roller on your welder is clean and free of debris. This is because the drive roller is responsible for feeding the welding wire from the spool out to the welding tip. If the drive roller is clogged with debris, it will not be able to spin freely, and as a result, the welding wire will not be able to feed properly.
To clean the drive roller, first make sure the power to the welder is switched off. Then use a brush or a cloth to carefully remove any debris from the roller. Do not use a sharp object such as a screwdriver or knife to scrape away debris, as this can damage the roller and lead to further problems.
Once the roller is clean, check to make sure it is spinning freely. You can do this by turning the power to the welder back on, and then pressing the trigger. If the roller is spinning freely, you should see the welding wire running smoothly through it. If it is not spinning freely, then the roller may need to be replaced or adjusted.
If the drive roller is clean and free of debris, and it is still not feeding the welding wire correctly, there may be an issue with the wire feed motor or the drive rollers. In this case, it is best to consult the manufacturer for advice on how to fix the issue.
Is the drive roll groove the correct size for the wire being used?
When troubleshooting issues with your welder not feeding wire correctly, one of the first things to check is the drive roll groove. This is the part of the welder that physically guides the wire through the welding process. It is important to make sure that the drive roll groove is the correct size for the wire being used.
Typically, the drive roll groove should measure just slightly larger than the wire size. If it is too small, the wire can become stuck and not feed properly. If it is too large, the wire may not be properly guided and may not feed correctly. The ideal size of the drive roll groove should be within 80 to 120 percent of the wire size.
If the drive roll groove is not the correct size, it should be replaced to ensure that the welder is working properly and that the wire is feeding correctly. This is a relatively simple fix, but it is important to make sure that the correct size drive roll groove is being used to ensure that the welder is working as it should.
Are the contacts in the welding gun clean and free of debris?
The welding gun contacts play an essential role in the welding process, and it is important to keep them clean and free of debris. If the contacts become clogged or dirty, the welding gun will not feed wire as it should. This is because the current needed to create an arc is not able to pass through the clogged contacts, resulting in the wire not melting and being fed properly.
To keep the welding gun contacts clean and free of debris, it is important to regularly inspect and clean them. A good practice is to make sure all clogged contact points are removed and the contacts are clean before and after each welding job. Check for any dirt, grime, or other debris that may have built up around the contacts and remove them. Additionally, make sure the contacts are free of any corrosion or oxidation.
If the contacts are clean and free of debris yet the welder still won’t feed wire, then it is likely the problem is somewhere else. Check the drive rolls and the feeder tube for any clogs or obstructions. Also, make sure the drive rolls are properly adjusted and that the proper size of wire is being used for your welder. If the problem persists, it may be necessary to consult a professional welder for further assistance.
Have you checked the welding wire for any breaks or deformations?
When troubleshooting why a welder isn’t feeding wire, the first step should be to check the welding wire for any breaks or deformations. If the wire is kinked, crushed, or has any other deformations, it can prevent the welder from feeding the wire. Additionally, any breaks or gaps in the wire can also prevent it from feeding properly. It is important to inspect the entire length of the welding wire to ensure that it is free of any breaks or deformations.
In order to properly inspect the welding wire, it should be held up to the light. It should be held at an angle so that any breaks or deformations can be easily seen. Additionally, the wire should be inspected for any bends or kinks that may have been caused by improper storage. The wire should be checked for any defects, such as rust or corrosion that could also prevent it from feeding properly.
Once the welding wire has been inspected, it should be tested in the welder to ensure that it is feeding properly. If the wire is feeding correctly, then the issue is likely with the welder itself. If the wire is not feeding properly, then the issue is likely with the welding wire and it should be replaced.