If you’re looking to take your metal fabrication projects to the next level, then you need to understand the basics of how to change the polarity on a MIG welder. Changing polarity is a key step in welding with different metals and can make a huge difference in the quality of your welds. It’s not complicated, but it’s important to get it right. With a few simple steps, you’ll be able to get the most out of your welder and take your metal fabrication projects from good to great!
What type of Mig Welder should you use?
When selecting a MIG welder, it is important to consider the type of material you will be welding, the amperage range you will need, and the output you desire. If you are looking for an output of around 80 amps, there are several welders that can meet your needs. Here are some of the options:
- Lincoln Electric MIG Welder – This welder offers a range of 30 to 200 amps, making it a great option for a wide range of welding projects. It is also capable of welding aluminum, stainless steel, and mild steel.
- Hobart Handler 140 MIG Welder – This welder has an output range of 25 to 140 amps, making it perfect for light to medium welding projects. It is capable of welding mild steel, stainless steel, aluminum, and galvanized steel.
- Miller MIG Welder – This welder has an output range of 30 to 140 amps, making it perfect for light to medium welding projects. It is capable of welding mild steel, stainless steel, aluminum, and galvanized steel.
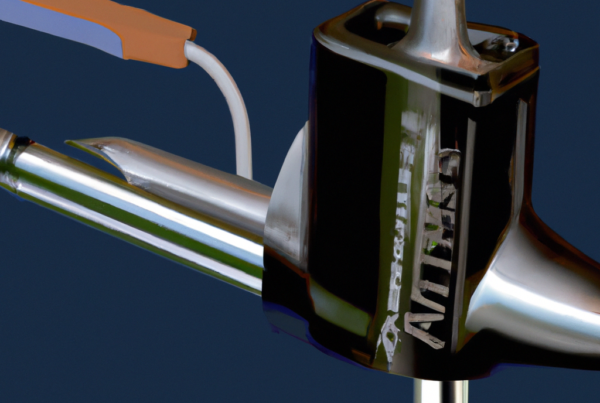
To change the polarity on a MIG welder, first, determine the type of welding you are doing. If you are using a solid wire, the polarity should be set to direct current electrode negative (DCEN). If you are using a flux-cored wire, the polarity should be set to direct current electrode positive (DCEP). Once the polarity is set, you can adjust the welding amperage as needed.
How to install the correct Mig Welder?
Mig welders are a great tool for home and professional use. Here are the steps to install the correct Mig Welder:
- Choose the type of Mig Welder you need – either flux-cored wire or solid wire.
- Identify the power requirements. Most Mig welders require a minimum of 220 volts.
- Check the amperage rating of the Mig Welder. Most Mig Welders require an output of 80 amps or higher.
- Select a gas regulator. A gas regulator is needed to control the welding gas.
- Ensure that the correct gas flow is set. Too much gas will create a weak weld.
- Check the polarity of the Mig Welder. Most Mig welders use a direct current (DC) power source.
Once you have installed the Mig Welder, you may need to change the polarity in order to weld different metals. Here is how to change polarity on Mig Welder:
- Switch off the power supply and unplug the Mig Welder from the power outlet.
- Loosen the retaining screws on the polarity switch.
- Move the switch to the desired position. The correct position depends on the type of metal you are welding.
- Tighten the retaining screws and plug the Mig Welder back into the power outlet.
- Turn on the power supply.
What safety precautions should be taken when changing the polarity on a Mig Welder?
Changing the polarity on a MIG welder can be dangerous if not done correctly. Here are some safety precautions to take when changing the polarity on a MIG welder:
- Read the user manual and safety instructions prior to changing the polarity.
- Turn off the power and unplug the MIG welder prior to changing the polarity.
- Wear the appropriate safety gear, including safety glasses, welding gloves, and a welding helmet.
- Familiarize yourself with the MIG welder and its components prior to changing the polarity.
- Double-check the polarity before turning the power back on.
- Be aware of the surrounding area and make sure nothing combustible is near the MIG welder.
By following these safety precautions, you can safely change the polarity on a MIG welder.
How to understand the wiring diagram of the Mig Welder?
Mig welding machines are used in many fabrication shops and home garages. It is important to understand the wiring diagram of the Mig Welder in order to properly use the machine. Here is a step-by-step guide on how to understand the wiring diagram of a Mig Welder:
- Identify the different components in the diagram. Look for the power input, the primary and secondary windings of the transformer, the wire feed motor, the contactor, and the gas solenoid.
- Understand the purpose of each component. The power input supplies the power to the machine. The primary and secondary windings of the transformer step up the voltage and control the welding current. The wire feed motor delivers the welding wire to the workpiece. The contactor is an electrical switch that turns the power on and off. The gas solenoid regulates the flow of the shielding gas.
- Understand the connections between the components. The power input is connected to the primary winding of the transformer. The secondary winding of the transformer is connected to the wire feed motor, contactor, and gas solenoid. The contactor is connected to the power input and the gas solenoid.
- Set the output current. This is typically done by adjusting the voltage on the power input. The output current should be around 80 (maximum 120).
By following these steps, you should be able to understand the wiring diagram of a Mig Welder and properly set the output current.
How to set the polarity correctly on a Mig Welder?
Changing the polarity on a Mig Welder is an important step in welding. It is a simple process that requires no tools and can be completed in a few minutes. Here’s how:
- Turn the welder off and unplug the power cord from the outlet. Ensure you are wearing protective equipment, including safety glasses and welding gloves.
- Remove the wire spool from the welder and loosen the tension knob.
- Locate the polarity switch on the side of the welder. This switch will have two positions – DCEN (Direct Current Electrode Negative) and DCEP (Direct Current Electrode Positive).
- Move the switch to the desired polarity position. For standard welding, DCEN is recommended.
- Tighten the tension knob on the wire spool and replace it in the welder.
- Turn the welder on and set the output to around 80 amps (maximum 120 amps).
How to test the polarity on a Mig Welder?
Mig welders have two types of polarity: direct current electrode negative (DCEN) and direct current electrode positive (DCEP). Testing the polarity of a Mig welder is an important step in ensuring that the machine is operating correctly. Here’s how to do it:
- Verify that the Mig welder is off and unplugged.
- Using a multimeter, set the device to measure AC voltage.
- Connect the positive lead of the multimeter to the positive output terminal of the Mig welder.
- Connect the negative lead of the multimeter to the negative output terminal of the Mig welder.
- Turn on the Mig welder and set the amperage to the maximum.
- Read the voltage on the multimeter. It should be between 80 and 120 volts.
If the voltage is not within this range, the polarity needs to be changed. To do this, you’ll need to switch the positive and negative outputs. After the switch is made, test the polarity again to ensure that the voltage is within the correct range.
What should you do if the polarity is not correct on a Mig Welder?
If the polarity is not correct on a MIG welder, it is important to take the necessary steps to correct it. Here’s how to change the polarity on a MIG welder:
- Turn off the power to the welder.
- Remove the welders plug from the wall outlet.
- Remove the feeder and ground cable from the welder.
- Locate the polarity switch on the back of the welder.
- Move the switch to the desired polarity setting.
- Reattach the feeder and ground cable to the welder.
- Plug the welder back into the wall outlet.
- Turn on the power to the welder.
Once the polarity has been changed, it is important to test it with a multimeter to ensure the output is between 80 and 120 amps. If the output is not within this range, the switch should be adjusted accordingly.
What type of consumables should you use when changing the polarity on a Mig Welder?
When changing the polarity on a Mig Welder, it is important to use the right consumables. Here are some items you should consider using:
- Welding Electrodes
- Welding Wires
- Gas Shielding
- Tip Cleaners
- Contact Tips
- Nozzle Cleaners
- Nozzle Gaskets
To ensure the best welds, use quality consumables. Make sure the welding electrodes, wires, and gas shielding are rated for the amperage and voltage your welder is capable of producing. Also, use tip cleaners, contact tips, nozzle cleaners, and nozzle gaskets that are designed for your welder. The right consumables will help ensure you get good quality welds.
What type of shielding gas should you use when changing the polarity on a Mig Welder?
When changing the polarity on a Mig Welder, it is important to use the correct type of shielding gas. The type of shielding gas you choose will depend on the output you are using. For an output of around 80 (maximum 120), you should use a shielding gas that is a blend of Argon and Carbon Dioxide, such as 75% Argon and 25% Carbon Dioxide. This type of shielding gas will provide optimal protection for your welds.
To change the polarity on a Mig Welder, follow these steps:
- Turn off the power to the machine.
- Locate the power switch and switch it to the opposite polarity.
- Reattach the shielding gas hose to the machine.
- Turn the machine back on and set the output to the desired level.
- Turn on the shielding gas and adjust the flow to the desired level.
- Test the machine to make sure it is working properly.
Following these steps will help ensure that your Mig Welder is safe and functioning properly when changing the polarity.
How to troubleshoot a Mig Welder with incorrect polarity?
Mig welding with incorrect polarity can cause poor welds and be dangerous. To troubleshoot an incorrect polarity issue, you will need to change the polarity on your mig welder. Here are the steps to do so:
- Locate the polarity switch on the machine.
- Check the current setting. It should be set to the same polarity as your welding wire.
- If the switch is set to the wrong polarity, change it to the correct one.
- Check the MIG gun connection. Make sure the ground clamp is connected to the negative terminal.
- Turn on the machine and set the voltage and wire speed according to the welding parameters.
- Test your welding process and ensure the polarity is correct.
Once the polarity is corrected, the output should be around 80-120 amps. If the output is not within this range, you may need to adjust the voltage or wire speed. If the issue persists, you may need to consult a professional.