Are you looking to make a custom welding helmet that will keep you safe and looking good while you work? If so, then you’ve come to the right place! With the right materials, tools, and a bit of know-how, you can create a custom welding helmet that looks great and provides superior protection. From selecting the right helmet shell to adding custom designs, I’ll show you how to make a custom welding helmet that you can be proud of. Let’s get started!
What materials are needed to make a custom welding helmet?
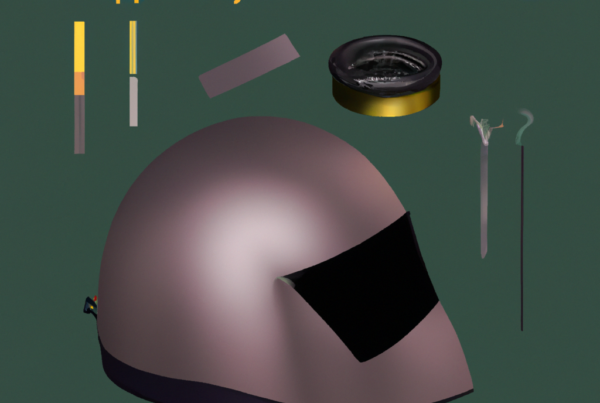
Making a custom welding helmet is a great way to express your personality while protecting yourself. Here is what you need to get started:
- Welding helmet
- Paint or markers
- Stencils (optional)
- Clear coat or sealant (optional)
- Painter’s tape (optional)
- Gloves
- Protective eyewear
Start by laying out all of your materials. Make sure you wear protective gloves and eyewear to protect yourself. Then clean the welding helmet with a damp cloth. If you are using paint, make sure the helmet is completely dry before you start.
Next, you can use the paint or markers to start designing your helmet. You can use stencils for a more precise design, or you can freehand. When you are finished, you can use a clear coat or sealant to add a protective layer and make the design last longer.
Finally, it’s important to protect the areas you don’t want covered in paint or marker. You can use painter’s tape to mark off areas that should not be painted. Once you are finished, you can enjoy your custom welding helmet!
How do you choose the right welding helmet for the job?
Choosing the right welding helmet for the job is essential for safety, comfort, and efficiency. Here are some tips to help you select the right welding helmet:
- Know your application: Consider the type of welding you are doing, the amperage of your welder, and the environment you will be working in.
- Choose the right lens: Select the right lens for the job, based on the type of welding and the amperage of your welder.
- Consider the helmet’s features: Look for features like adjustable headgear, an adjustable viewing window, and an auto-darkening filter.
- Choose the right shade: Select a shade that is compatible with your welder and the type of welding you are doing.
- Think about comfort: Comfort is key when it comes to welding helmets, so be sure to select one with adjustable headgear and a comfortable fit.
By following these tips, you can make an informed decision about the right welding helmet for the job.
What safety considerations should be taken into account when welding?
When welding, safety should always be the top priority. Here are some key safety considerations to keep in mind:
- Always wear protective clothing, including welding helmets, gloves, and leather jackets.
- Make sure the area is well-ventilated to avoid inhalation of harmful fumes and gases.
- Never weld without a fire extinguisher nearby.
- Never weld on a flammable surface.
- Keep flammable materials away from the welding area.
- Always use the correct type and size of welding rod.
- Never look directly at the arc.
- Never weld without eye protection.
If you are making your own custom welding helmet, be sure to use a material that is fire-resistant and can handle the heat of welding. You should also make sure the helmet is comfortable and secure enough to protect your face and eyes from the sparks and heat. Lastly, check the helmet for any defects before each use.
How do you prepare the welding helmet for customization?
Before you can customize your welding helmet, you’ll need to prepare it first. Here’s how:
- Remove the lens from the helmet and set it aside.
- Clean the helmet with a mild detergent and a damp cloth to remove any dirt or debris.
- Rinse the helmet and let it air dry completely.
- Sand the helmet surface with fine-grit sandpaper to create a smooth finish.
- Wipe down the helmet with a clean cloth to remove any dust or residue.
- Mask off any areas you don’t want to paint, such as the lens, straps, and vents.
Once you’ve prepped the welding helmet, you’re ready to start customizing it to make it your own!
What tools are needed to customize the welding helmet?
A custom welding helmet requires the following tools:
- Welding helmet
- Safety glasses
- Protective gloves
- Stencils
- Painting supplies
- Paint brushes
- Sandpaper
- Drill
- Screwdriver
- Utility knife
- Clear sealer
To customize your welding helmet, first use sandpaper to smooth out any rough edges or imperfections. Next, measure the surface area of the helmet and select a stencil that will fit appropriately. Next, use a drill to make any necessary holes in the helmet and use a screwdriver to attach any hardware. Next, use the utility knife to cut out the stencil and paint it with the desired design. Then, use the clear sealer to make the design last longer. Finally, wear the helmet with safety glasses and protective gloves to ensure safety when welding.
What techniques should be used to add a custom design to the welding helmet?
Adding a custom design to a welding helmet is a great way to make it stand out and personalize it. Here are some techniques that can be used to achieve this:
- Using a vinyl wrap: Vinyl wraps can be printed with a custom design and applied to the welding helmet.
- Applying a decal: Decals are a great way to add a custom design to the welding helmet as they come in a variety of sizes and colors.
- Painting the helmet: A custom design can be painted directly onto the welding helmet.
- Engraving the helmet: Engraving is a great way to add a unique and permanent design to the welding helmet.
No matter the technique used, it is important to make sure that the design does not obstruct the user’s vision or interfere with the helmet’s performance.
How do you attach the custom design to the welding helmet?
To attach a custom design to a welding helmet, you will need the following items:
- Welding Helmet
- Custom Design
- Heat Transfer Vinyl
- Transfer Tape
- Iron or Heat Press
To begin the process, start by printing out your custom design onto the heat transfer vinyl. Next, cut out the design and remove the excess vinyl. Peel off the backing from the vinyl and place the design onto the welding helmet. Use the transfer tape to press the design onto the helmet.
Using either an iron or heat press, carefully press the design onto the helmet for around 10-15 seconds. Allow the helmet to cool before peeling off the transfer tape. Your custom design is now attached to the welding helmet!
How do you protect the custom design on the welding helmet?
Welding helmets with custom designs are an excellent way to express your personality and style. Here are some tips on how to protect that unique design:
1. Clean the helmet regularly: After each welding session, use a clean cloth to remove any dirt or debris. This will help keep your helmet looking good as new.
2. Apply a protective coating: Applying a clear protective coating to your welding helmet will help protect the custom design from scratches and fading. Make sure to use a product specifically designed for helmets.
3. Use a dust cover: When not in use, keep your helmet in a dust cover. This will help protect against dust and other particles that can damage the custom design.
4. Handle with care: When handling your helmet, always use two hands to support the sides. Dropping your helmet can cause the custom design to crack or chip.
5. Avoid direct sunlight: Direct sunlight can cause the custom design to fade over time. Keep your helmet in a safe place away from direct sunlight.
By following these tips, you can ensure your custom welding helmet stays looking great for years to come.
What safety checks should be done before using the custom welding helmet?
Before using a custom welding helmet, it is important to ensure that it is safe and secure. Here are some safety checks to consider:
- Inspect the helmet for any cracks or damage. Be sure to check for any exposed wiring or sharp edges.
- Check that the helmet is properly secured to the head and is securely fastened.
- Make sure the shield and the lens are properly aligned and securely attached.
- Ensure that the helmet is properly ventilated and that the air flow is not blocked.
- Check that the helmet is made of a fire-resistant material and that all straps are flame resistant.
- Ensure that the helmet is rated for the type of welding you will be doing.
- Test the helmet for proper protection against UV rays and infrared radiation.
- Check that the helmet has the proper filters and lenses for the type of welding you will be doing.
By following these safety checks, you can ensure that your custom welding helmet is safe to use.
How do you properly store the custom welding helmet?
Storing a custom welding helmet is easy and simple. Here are some tips to help you store yours:
1. After every use, use a soft cloth to wipe the helmet and make sure all dust and dirt is removed.
2. Make sure to store the helmet in a cool, dry place away from direct sunlight and heat.
3. Ensure that the helmet is stored upright, and not on its side.
4. Use a protective bag to store the helmet when carrying it, to avoid scratching the lens and other parts.
5. Keep the helmet away from any strong chemicals or solvents, as they can damage the helmet.
6. Check the helmet before each use to make sure it is in good condition.